How To Eat Rockstars - Photoshop
 Hey
Hey
While surfing the web I came across a book by Freelance Switch. The book is all about being a new person into Freelancing, what interested me most is the book cover (other than the cool book). Its simple and easy to do. The following tutorial will try to emulate the effects found in the cover design. Its very simple and uses some common effects for creating stars. Every iteration of this will be different, so yours could end up completely different to mine. You will need one shape (the rockstar) i'll provide a link to it when we get to that stage. This tutorial is quite long since I wanted to explain everything.
Step 1) The first step (as always) is to create your canvas. Make it taller than it is wide, i've used about 500px x 800px.
Step 2) Colour the background black. This is going to be the base colour.
Step 3) Create a new layer this will be for the noise. Fill this layer (again) black.
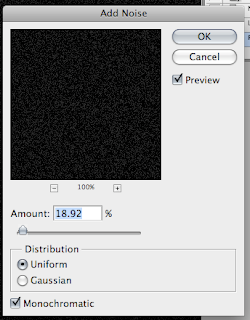
Step 4) Go to Filters > Noise > Add Noise. Make sure the colour options in your sidebar is black and white. Add some noise, not to much, you don't want to over whelm the page. This will be used to make the big stars.
Although you cannot see it very clearly in the image below you want to keep the noise to minimum. Having to much noise will make the next layers a mess.
Step 5) At the moment there is to many white blobs on the page to be any real use. To counter this me need to fatten them up. Go Filters > Blur> Gaussian Blur. Set the blur to a low amount around 2-3 pixels and click ok. This will reduce the amount of blobs and fatten a couple of them up.
Step 6) There is still to many at the moment (they are the right size). Go Image > Adjustments >Threshold and reduce the slider. This will take some time. You need to move the slider so there is some stars but not to many or not enough. Take your time at this stage to get a good amount.
Step 7) Apply a Gaussian Blur once again to soften the edges of the blobs. You now have big stars.
Step 8) Repeat the process again by creating a new layer, filling it black, adding noise etc etc. In the noise stage add more noise than you did the first time. It takes a bit of work and a lot of undoing to get a good effect but work on it.
Step 9) Set the small blobs layer to screen this will remove the black and let you see the big blobs through the small blobs. You can't see it too well in the image below, but it is needed for later. Hide these layers when you have finished. The background layer should still be showing.
Step 10) This is where the main character will come in. Go to Spoon Graphics and download either the image or the vector. Vectors can be opened in Photoshop although the quality does reduce when enlarged. Use the marquee tool to cut out the rock star and place it on the canvas on a new layer.
Step 11) At the moment the rock star is black and we really need it white. At the moment the black used is 100k black (it was on mine) so using the inverse command will not work as well. You end up with a mucky white. To get a white character we are going to use a layer properties option. To do this use the magic wand to select the white of the guitar, delete this.
Step 12) Double click the rock star layer or go Layer > Layer Properties click on colour overlay and set to white. This will make the rock star white. You had to delete parts of the image to get the definition of the guitar. It should look something like this.
Step 13) Unhide the small blob layer. Use the eraser tool with a soft edge to remove most of the stars. Make a shape that looks cool.
Step 14) As you may notice the black on the small stars layer is not black. This is easily corrected go to Image > Adjustments > Hue/Saturation and lower the values all the way down to -100. This will make the blacks black. If the stars at the moment look to light, duplicate the layer.
Step 15) Unhide the bigger blobs layer. Use the magic wand to select the not quite black and delete it. For some random reason using the above method doesn't work as well. Use the eraser to erase some the blobs.
Step 16) This is the fine tuning part. Use the soft eraser to erase parts of the image that are not needed. You don't want a massive concentration of blobs in one spot.
Step 17) The last part is to add your own text. I have used Cooper plate Gothic Bold. Add your text on new layers and use the transform tools to transform the text to your liking.
Step 18) On new layers for each seperate surround add a background in yellow. Use a slightly browner darker yellow, than the default bright version.
Step 19) Apply a small drop shadow using the layer properties box. Add a bit of brown into the mix for the shadow.
Step 20) Add a bit of added text to finish. Export through File > Save As.
Its a cool effect. I like it and it was very simple to do. I would check out going to Rockstar Freelance Book if you want to look at the original cover and I would definitely check out the book if you want learn a couple of new things.


0 comments:
Post a Comment