Hey
This is going to be a simple tutorial which will show you how to make an Apple style advert. Its pretty simple and fun to do. It only uses a couple of effects and as a result you can probably do this within an hour. The source pack is included here if you want all the materials.
Step 1) The first step is to create your canvas. I have chose a 600 pixel by 750 pixel canvas size. Chose any style you want. Colour the background in #2c2c2c.
Step 2) On a new layer create a rounded square. The corners are 30px in diameter. It can be any colour you want. Align the square with the centre of the canvas by selecting the two layers, clicking on the transform tool in the toolbox and then selecting the align center in the toolbar. After you have done this nudge, with the arrow keys, the square up. This is so you can add in some extra text at the bottom.

Step 3) Create a new layer again, in the layers palette (Window > Layers) right click on the layer and select clipping mask or you can go to Layer > Create Clipping Mask.
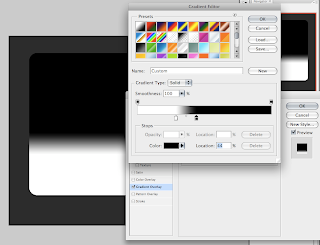
Step 4) On this layer fill it in with a back to white gradient. Move the markers closer together and move slightly to one side. Add this to the new layer. Slightly ignore the image below because I was going to do this as a layer style, but it didn't work with the later steps.
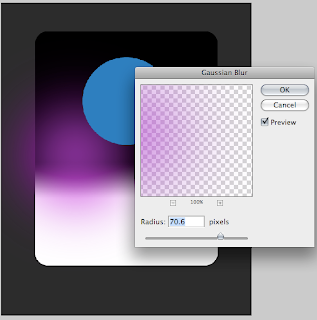
Step 5) Create three new layers. On each layer draw a circle with purple, blue or green in it. Let them overlap the edges and be different sizes. Draw the circles so if there was an imaginary triangle between the three the centre of this triangle is approximately centre on of the square, check out the images below for a better idea.
Step 6) Select a layer and apply a Gaussian Blur, increase the blur dramatically. Apply this to all three layers using the same amount of blur.
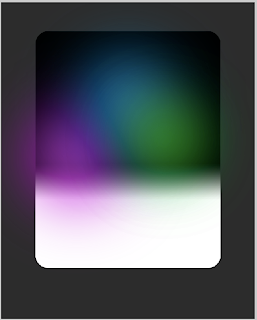
Step 7) Merge these three layers by selecting all three and going to Layer > Merge Layers. Change the layer to a clipping mask.
Step 8) Create a new layer fill this in black. Go to Filter > Render > Lens Flare. Select the default option and adjust the brightness so it appears a medium brightness.
Step 9) In the layers palette change the blending option to screen. Move and transform the layer so the bright part is in the centre of the coloured circles.

Step 10) Create a new layer, add a clipping mask. Draw in a black square at the top of the rounded square. Add in a small dark grey stroke of 1px to finish.

Step 11) Repeat this process but with white at the bottom.
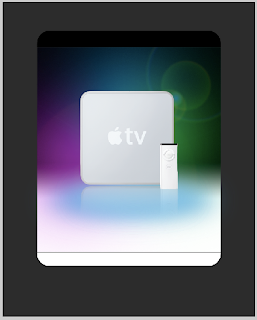
Step 12) Add in the main image. I have chosen an Apple TV. A transparent .png can be found in the source pack. Insert the image so that it is centre.
Step 13) Create two new layers below the image, draw in a dark and light blue ellipse and add a large Gaussian Blur as before.
Step 14) Duplicate the Apple TV layer. Go to Edit > Free Transform. Select the flip vertical option, move the new image so that it lines up with the bottom of the original image.
Step 15) With the new image selected go to Layer > Layer Mask > Reveal all. On this layer add in a black and white gradient so that only the very top of the image is shown. This is also known as a reflected shadow.
Step 16) Finally add in text. I have used Lucida Grande. Change the colours so they fit and look good. The Apple logo was included in part of the font on a Mac and is found by pressing Option + Shift + K. It may be available on other operating systems, have a look at your font maps for more information.

Step 17) You can always finish it off by adding in some small images and extra text. Both of the images below are in the source pack. The very bottom part is a small area for the small print.

It looks quite effect and could definitely be used as an advert. It could do with some minor touch ups. But otherwise it is quite cool. You can download the source here which includes the final psd.


