Creating A 3D Polaroid - Photoshop
Hey
After surfing the internet, as I do, I cam across a cool idea on how to 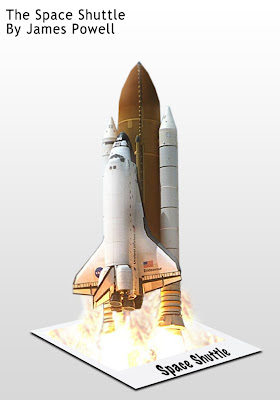 make an image jump out of a Polaroid. Its an interesting effect and looks great when completed. Its a long tutorial and will take some time to complete. We are trying to achieve and effect similar to the image on the right.
For this tutorial you will need:
Photoshop or similar
The Space Shuttle Photo (Included)
About 45 - 1 hour
Step 1) The first step is to create your canvas. I always chose a size that is larger than I will eventually need it. Have a size of about 800 pixels by 1200 pixels. The size can always be cropped later.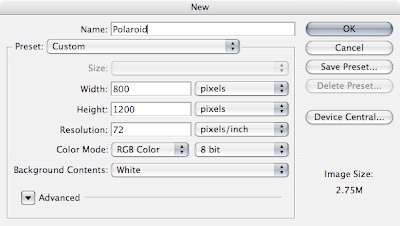
Step 2) The first step is to make the basic polaroid. Change the background layer, which at this point is named "Background". Double click it and press ok when the dialog box comes up. Change the layer to any colour other than white. I've randomly chosen blue.
The next step is to create a new layer. Select the Pen tool, and roughly draw the following shape onto the canvas by clicking 3 times in the appropriate places and once more on the starting point. Colour it white in the layers palette.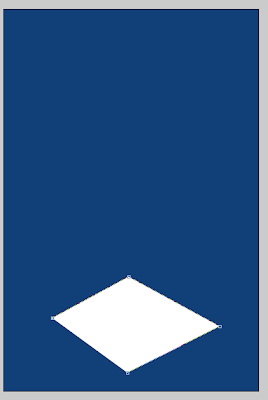
Step 3) This step is to find tune the layer to look like a flat polaroid. Use the white tipped selection tool (Shift + A) or hold command on the mac (I think it's Alt on Windows) and move the points so your shape resembles something like the image below. Take you time, you want this to look as good as possible.
Step 4) We now have our basic shape, we need to add colour. Select the background layer (mines coloured blue), double click it to bring up the properties box. Select the Gradient Overlay box. Change the gradient so the darkest colour is a lightish grey. Align the gradient so the darkest part is at the bottom. Refer to the image below if you are stuck.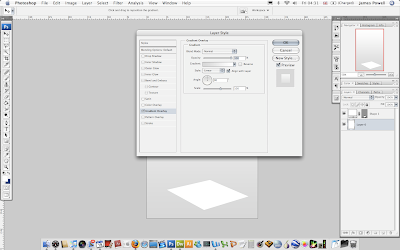
Step 5) Now we have a different coloured background, we can change the colour of the polaroid. We need to darken the colour of the white square, because we are adding a white layer in one of the next steps.
Double click the polaroid layer and select inner glow. Change the colour to black and reduce all of the values as shown in the image. This is very subtle which is the effect we are aiming for.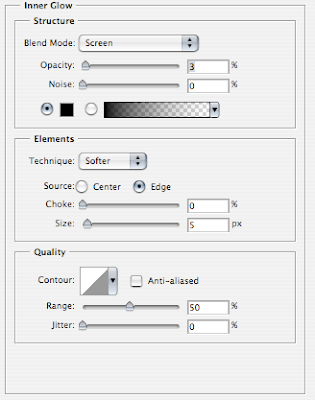
Select Colour Overlay. The gradient over layer is the main way to change the colour of the image. Pick a grey that isn't to dark, but isn't to light. Set the opacity all the way down.
The final step is to add a Gradient Overlay. This will create a gradient over the top of the image. Reduce the opacity of the gradient all the way down. Line up the gradient so the darkest part is on the left hand side of the polaroid as we look at it. Its about 110-120 degrees.
Click apply when you are done.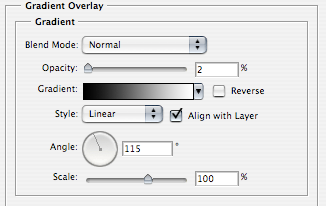
Step 6) The next step is to add a white area where the action of the photo will happen. In the image below you can notice the effect we have applied in the previous step.
Duplicate the layer, by dragging and dropping the layer onto the layer icon in the layer pallet. Right click on the layer and select clear layer style to remove the style. The next step is to reduce the layer. Press Command + T (Ctrl + T) or Edit > Free Transform and move the edges in ever so slightly. About 10%.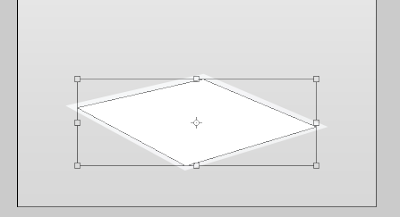
Step 7) Use the white pen tool (Shift + A) or Command click (Alt + Click) on the points and move them up the polaroid. Adjust the points until the layer looks like this.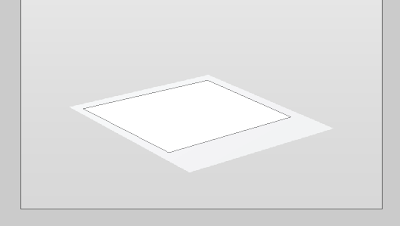
Step 8) Duplicate the first polaroid layer and remove the styling again by right clicking. Change the colour to black and move the layer down. You want a clear edge, to be used as a shadow. Right click on the layer and select rasterize layer.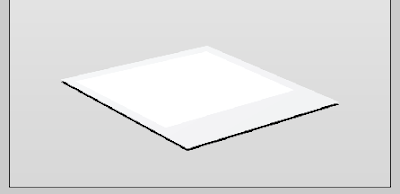
Step 9) With the Black layer still selected go Filter > Blur > Gaussian Blur. Set the value to about 2.5. This will blue the black layer and create a shadow.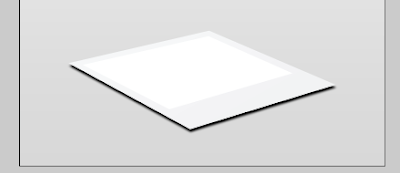
Step 10) The next step is to add the 3D / Action part of the image to the polaroid. You can pick any image, there just needs to be something happing and moving upwards. Click the image below to use the full size. This image was found here.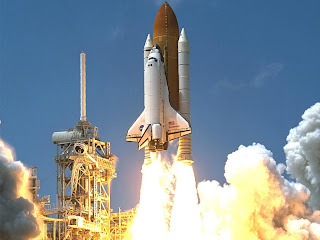
Step 11) Use the pen tool again, but set the selection to paths, instead of shape. This can be done in the top left corner of the tool bar. This will stop a coloured shape being create and only a path.
Step 12) Insert the image you have chosen. I've cropped mine before inserting it. Reduce the opacity. Draw around the Space Shuttle and some of the exhaust. It doesn't need to be 100% perfect but you shouldn't go into the actual shuttle itself.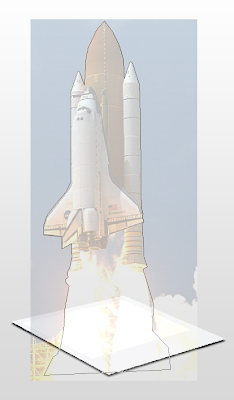
Step 13) We now need to work with this path. Use the Path pallet (Windows > Paths), and select the path. Right click on the path and select "Make Selection". This will change the path into a selection. Go to Select > Inverse. This will select everything but the Shuttle. Press delete to remove the sky.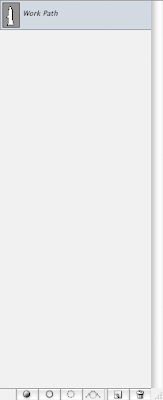
Step 14) Using the eraser, go around the edges and remove any pixels that shouldn't be there. Try at this point to be as precise as possible. Blur the brush tip (Shift + [ ) if it helps.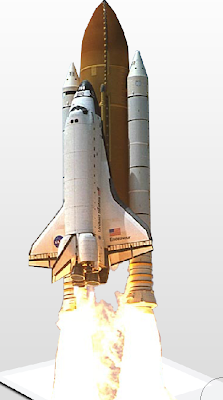
Step 15) Use the blur tool lightly on the edges to remove the harshness created by deleting the pixels. The edge shouldn't be blurred to much.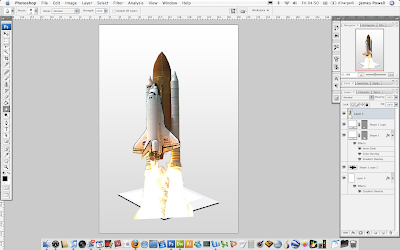
Step 16) Reposition the image as necessary. If I was to do this again, I would put the image slightly higher up.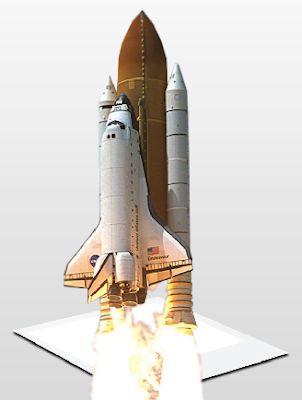
Step 17) We now need to square off the exhaust. Reduce the opactiy of the shuttle again and draw a path along the lines of the white area in the polaroid, include any of the excess thrust. Once again, go to the paths palette, make the path into the selection and press delete. You should end up with something like this.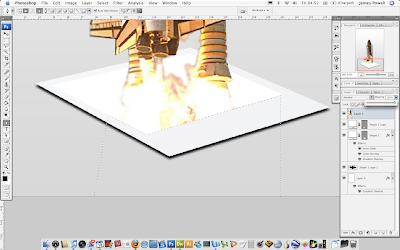
An overall look at the image we have so far.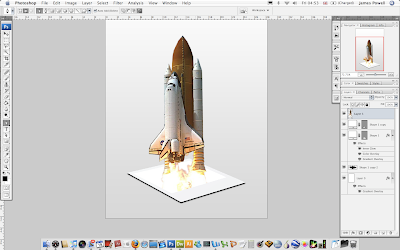
You palette menu should look something like this. It doesn't matter too much if it doesn't. I try to work on as many layers as possible.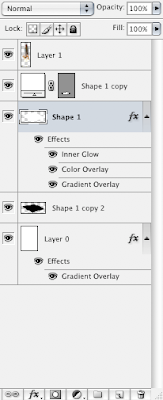
Step 18) At this point it would look good it the white part of the polaroid had some thrust added. Create a new layer. On the white layer of the polaroid, use the magic want to select the white area. Move back now to the layer we have just created.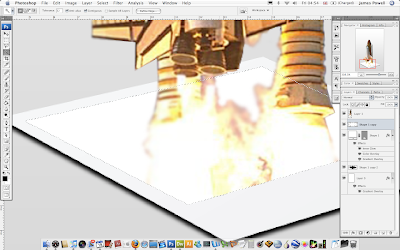
Step 19) Use the clone tool and add some thrust to the white area. When you have completed this, deselect the selection and add some thrust to the sides of the booster rockets. The selection is so there is a hard edge around the sides of the polaroid.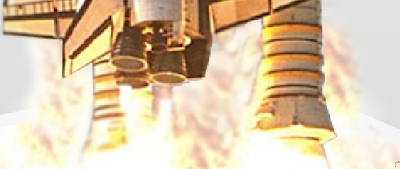
Step 20) Add some text (I've used Marker Felt) if you wish and use the transform options to move it into a good position. You may need to rasterize this. Save and export as .jpg and you are done.
Please leave a comment, with you creations.


5 comments:
Very very cool tutorial. You could also add a little perspective transform to make it look a little more realistic
Yeah you could, I also think the rocket could be rotated to the right just a little.
Not bad... but it's been done. Go to my example to see it in a little more dynamic fashion.
Thanks, but i'm afraid your link doesn't work.
Sorry... This is the correct link
Post a Comment